
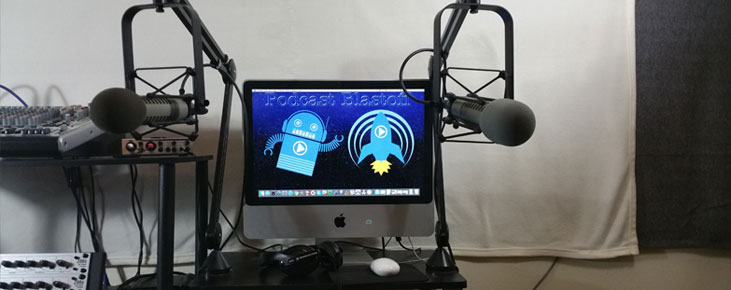
Podcast Like The Pros, On Any Budget
Reaching the world with your message is more affordable than ever. But, if you don't do it right, you can still waste a lot of money trying to start up a podcast. I've spent a lot of time and money on creating many hit podcasts and building my own podcast studio. Over the years, I've made some costly mistakes, and I've learned some valuable lessons.
In this post, I'm going to share some of that with you. This will help you avoid wasting money on bad purchases as you build your own podcast set-up. I'll also be giving you an in-depth look at the equipment you will need to get a great sounding show. You’ll also discover how to achieve great audio quality, on any budget.
This post will save you lots of money if you're just starting out. It'll help you get the best gear out there and take your production to the next level. But if you just want the basics, download the Podcast Quick Start Guide by clicking the link below

We'll start with the Top 5 "Must Haves". These are the parts of the chain that are vital in creating a great sounding podcast. If you only plan to host your podcast on blog talk radio, this post will be more than what you need. But, if you want to put out a podcast that makes your listeners want to listen, this post is for you.
1. The Microphone
The most important piece of equipment to get right is the microphone. It's the first link in the audio chain. If you get it wrong here, there is little you can do later to improve your vocals. But if you start off with a good microphone, you're almost guaranteed great audio, later.
Different microphones are better suited for different jobs. Not knowing what mic is best for podcasting can be a big obstacle. Sadly, most newbie podcasters buy a mic that looks cool, but sounds horrible. I want to help you avoid that costly mistake.
Let me show you the best mic for podcasting, on a beginner’s budget. I'll also show you the best podcast mic you can get for your money, if you're looking to invest. I own both of these mics, and can't recommend them enough.
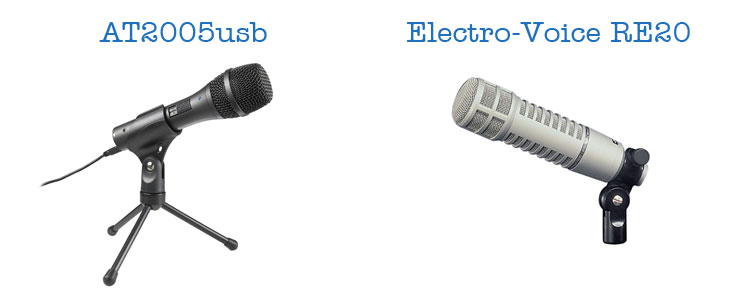
a) On a Budget: AT2005USB
First up is the Audio Technica 2005USB. Without a doubt, it's the best podcast microphone on the market for under $100. It is a cardioid microphone, so it only picks the sounds around the head of the mic. This also means it almost completely eliminates any background noises.
It also has multiple outputs, including classic XLR and USB. It even has a headphone jack, so you can monitor your output levels while you record. You can connect it to a mixer with a classic XLR plug. Or, use a USB cord to plug it straight into your computer. With this mic and a decent recording program, your podcast can have quality audio, right off the bat.
b) For the Baller: Electro-Voice RE20
If you're going for Top of the Line, look no further than the RE20 cardioid microphone, from Electro-Voice. This is the industry standard in talk radio, and for good reason. Most microphones require the user to learn some decent mic control. This one can make even the most amateurish announcer sound like a polished pro.
With this mic, and a decent pre-amp, you'll sound like you're broadcasting from a multi-million dollar studio. The only drawback, just the microphone alone will set you back around $500. And if you want to use it to its full potential, you'll need to get all the standard accessories. Money well spent, if you ask me.
If you're serious about your podcast, this is the mic I would recommend getting. I have two of them in my studio. The sound quality is great and I always get clean, clear recordings of my vocals. It even works great for clients that have no mic control at all. If you can afford it, this is the way to go.
2. The Headphones
Just a heads-up. No matter what headphones you get, you might hate the sound of your voice. We get used to a skewed version of our own voice, due to the cavities in the structure of our skulls. The first time you listen to your voice through some headphones, you might think there's something wrong with them. There's not. It's just your first time hearing your true voice.
That said, some headphones are better than others, especially when it comes to recording your podcast. The most important thing to watch out for is noise bleed. You want headphones that will not leak noise out of the sides. Otherwise, that noise might be picked up by your microphone. This can cause huge headaches when you're trying to mix down your podcast.
The two headphones I feature below were picked because they both do a good job of preventing noise bleed. Both are also comfortable to wear. Important, if you're going to be using them for long periods of time.
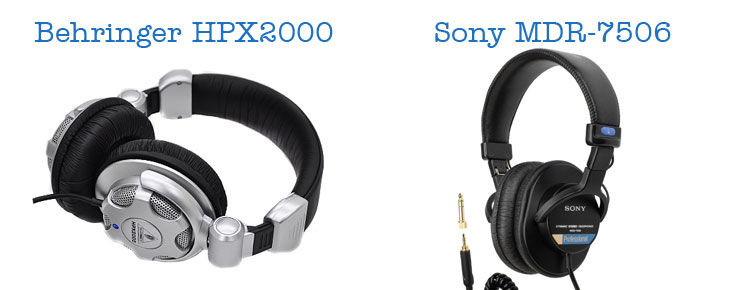
a) On a Budget: Behringer HPX2000
You can pick up these headphones for around $20. They're made for mixing music. But they work well for recording a podcast if you're on a budget.
My only beef with these headphones is that they are a little heavy on the bass and high-ends. This is great for music. But vocals fall in the mid-range frequencies, making them less than ideal.
These headphones are great, for the price and most people will be more than satisfied with them. But if you've got some extra money to spend, there are better choices for podcasting.
b) For the Baller: Sony MDR-7506
For under $100, you can get these beautiful sounding headphones from Sony. They are perfect for podcasting and radio, in general. You can listen to them at high volume and not get very much noise-bleed at all. The other great thing about them is how accurate they reproduce mid-range frequencies. This means that what you hear is almost exactly what you're recording.
These are my favorite headphones, all around. Music sounds great through them. But where they shine is on the playback of vocals. If you have the money to spend, don't mess around with anything else. These are the headphones you want in your studio.
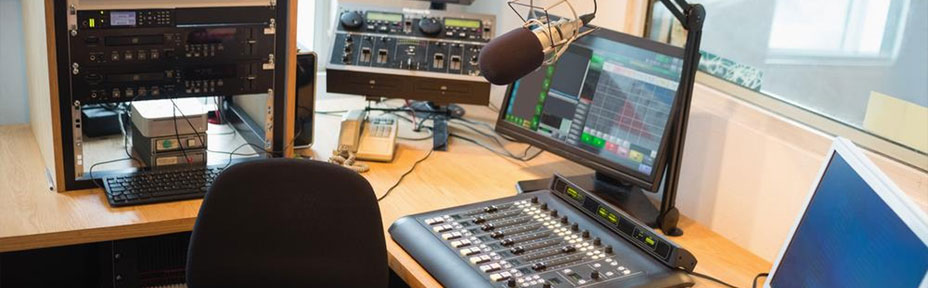
3. Mixer and Audio Interface

In almost all cases, you will need a mixer for getting audio into your computer or recording unit. The mixer is what you plug your mic into. If you want to play audio from your phone, tablet, or sampler, you will also need to plug them into your mixer.
A mixer is just an audio board that can send and receive multiple audio inputs. It allows you to affect those audio signals. Basic mixers give you control over EQ, panning, and volume. More advanced mixers may offer special effects and make possible more advanced mixing techniques.
Another thing to look out for is the mix-minus feature. Mix-minus is where you split your audio signals into two separate channels. One channel for you, and the other channel for your guest. This allows you to have total control over both sets of vocals, each on their own separate track.
If one side needs more compression, you can affect it, without altering the other track. This can be done if your mixer has an AUX send and return control. This is an advanced editing method that deserves its own blog post. So we'll leave it at that, for here.
The last thing to look out for is a USB output. If you want to go straight from the mixer into the computer, you will need a mixer with a USB output. This makes the process a whole lot easier, but it also takes away some of your control over the final product.
Using a USB output restricts the number of channels you can record and assign at once. For basic podcasting, a USB mixer will do just fine. But some podcasters still prefer using an audio interface. We'll take a look at both options, below.
a) On a Budget: Behringer XENYX502 with UCA202 Audio Interface
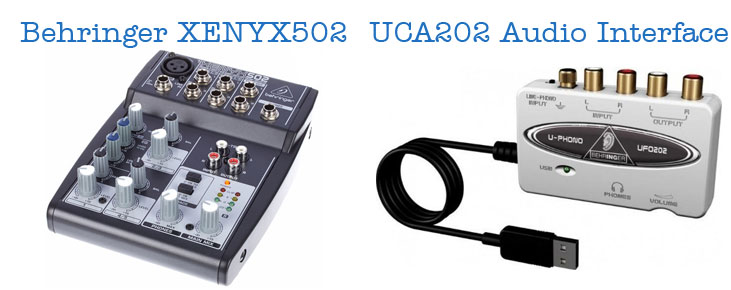
This little mixer is a great place to start for the solo podcaster. It has an XLR mic input, as well as 4 mono inputs. It features volume control for each channel and a 2-band EQ for your vocals. You can plug in your phone or tablet to conduct interviews, play sound effects, or play bumper music.
This is not a USB output mixer. That means you'll have to use an interface to connect it to your computer. I recommend something simple, like the UCA202 Audio Interface.
You'll need to run some male/male AUX cords from your mixer to the interface. Then, connect the interface to your computer via the USB. This is a simple and cheap way to get great audio into your computer, for mixing down later.
b) For the Baller: PreSonus mixer and Komplete Audio 6

Now, let's have a little fun and jump to the extreme opposite end of the pricing spectrum. This is the PreSonus StudioLive 16 channel mixer. It could easily be considered the Cadillac of mixing boards.
It uses firewire to connect with your computer. This means the audio quality is top notch, and the latency is almost zero. It can handle 16 inputs at once. It can also send and receive audio, to and from your computer, at the same time. It boasts 4 AUX sends, and 2 internal FX buses.
The only time you would ever need this kind of hardware is if you were recording a show with multiple hosts. And maybe a live band to boot. Still, a podcaster can dream, right?
4. Recording Software
Now that you've got a way to capture your voice and send it to the computer, you need some sort of way to record and edit it. This is where recording software comes into play. This kind of software is known as a DAW, or Digital Audio Workstation.
There is a large variety of DAW's out there, and they range widely in price. Some, you can get for free. While others can set you back thousands of dollars.
For creating a podcast, you should be able to make do with a free DAW. After all, you only need to record, cut, equalize and fade tracks. This can all be done quite well with one of the free DAW's out there.
a) On a Budget: GarageBand, Audacity, ProTools First
Lots of podcasters are using Macs, so that is where we will start. Macs come with GarageBand already installed. GarageBand is easy to use (free for Mac users) and can handle a good amount of channels running at one time.
Obviously, the better your RAM, the better GarageBand will run. But for free software, it is pretty impressive. It allows for independent control of your tracks and comes with a nice collection of effects. If you are a Mac user, this is a great tool for you.
For the PC users, there is Audacity. This is a free DAW that is also open sourced, so it is always getting better. It is not as pretty or professional looking as GarageBand is, but it does the job.
My only real complaint about audacity is that it doesn't have a built-in mp3 mix-down option. You can get a third party plug-in for this, but none of them meet my expectations as an audio engineer. Fortunately, there is a third option.
ProTools First is the new software from audio powerhouse ProTools. It is free and works great for podcasting. I might be a little partial, as I learned to mix audio on ProTools, but this is definitely my favorite of the three.
It's a scaled-down version of their paid DAW, but it works great, right out of the box. You can even buy affordable, high-quality plug-ins, from the ProTools store. The best part is, ProTools First is available for PC and Mac. It's a great solution for everybody.
b) For the Baller: ProTools, Cubase, or Logic Pro
Again, I'm going into overkill mode. If you want to just go completely overboard and spend way more money than you have to, there is a way. You can always pay for a full-on professional DAW.
These are usually made for professional recording studios and might be a little bit like using a bazooka to kill a housefly. I would recommend going with one of the free options, but here are a few others that you can empty out your wallet on.
Cubase, by Steinberg
Logic Pro, by Apple
ProTools 12, by Avid
Again, I have to stress, you can have a great sounding podcast without having to buy an expensive DAW. I only included this for those of you who enjoy throwing your money away. This is why I did not review each of the higher-end DAW's, individually. If you want to throw your money away, they will all work just fine for that.
5. Cables and Cords
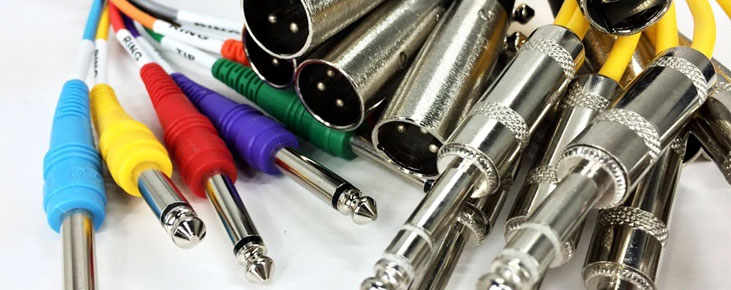
There are a bunch of different types of cables and cords for you to get lost in. Let's spend a minute going over the different types, and what each one is used for, shall we? Starting with balanced vs unbalanced.
An unbalanced cable only sends one signal. It is often used to send mono left and right signals, via 2 separate unbalanced cables. This type of cable is often used for electric guitars and other mono single devices. Don't use unbalanced cables longer than 10 feet in length, or you run the risk of getting a distorted signal.
Balanced cables send 2 separate signals, in one cable. They do a better job eliminating any unwanted noise and can be used at up to 50 feet without any issues. The specifics of how they work would need its own blog post to explain.
Just know this. All stereo signals will require a balanced cable. And most microphones will, as well.
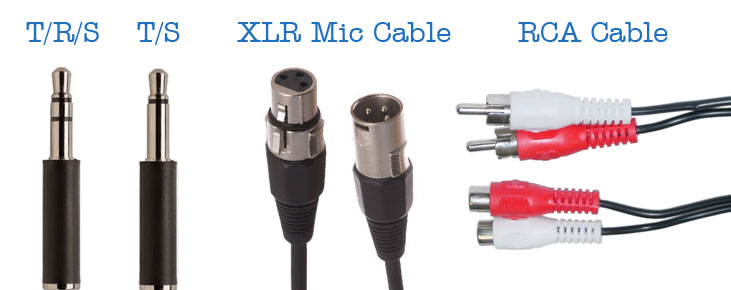
You can determine if a cable is balanced or unbalanced by checking its connector. If the cable is unbalanced, it will only have 1 divider, making a T-S (Tip-Sleeve) connector. If it is balanced, it will have 3 sections at the connector. This is known as T-R-S (Tip-Ring-Sleeve).
Microphones will use an XLR connection with 3 prongs. Mic cables will input XLR at one end, and output XLR or T-R-S at the other. Just make sure that you plug the cord into your mixer through a balanced input.
The other common cords that you will find yourself using will be RCA/AUX cables. These are typically two mono cables, bound together, with red and white outputs at each end. You can use these cables for connecting a mixer to an audio interface.
They can also be used to convert two mono signals into a stereo signal. You can find cords that have RCA on one end and T-R-S on the other. This makes for an easy way to play samples from a phone or a tablet into your mixer.
a) On a Budget: Cords and Cables
Look for these cables at Wal-Mart or RadioShack. You can find them there, pretty inexpensively.
b) For the Baller: Cords and Cables
Look for Monster cables at Best Buy, Musicians Friend or Guitar Center. They’ll cost a little more. But they’ll sound better and last longer.
Optional Gear to Step Up Your Pod Game
From here on out, I will be focusing on bonus tools and gear. Nothing here is a "must have", like the things mentioned above. But they'll all make podcasting a lot easier, if you have them.
1. Microphone Accessories
Holding a microphone, while trying to record an entire podcast, is no fun. That's where the mic stand comes into play. Microphone stands have existed almost as long as microphones, themselves. There are a few different styles to choose from, and we'll cover them in a second.
Some other popular microphone accessories are pop filters and foam windscreen. These are used to stop "plosives", which is what happens when a large gust of breath hits the microphone. Usually, words with "P" and "WH" will cause plosives.
You can record your podcast without these accessories, but I wouldn't recommend it.
a) On a Budget: Mic Stand and Foam Pop Filter
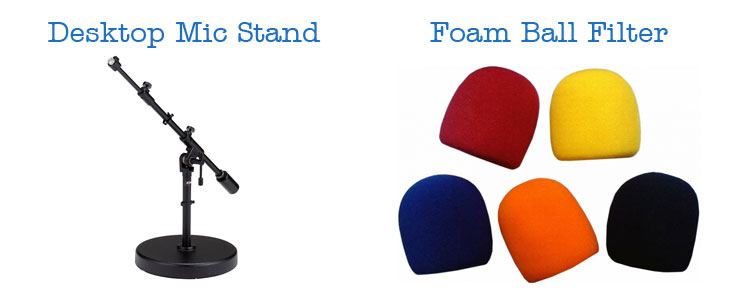
For around $95, you can pick up one of these weighted desktop mic stands. They have a heavy base that keeps the mic in place while you record. This type of arm will fit almost any kind of microphone. My only complaints about this type of mic stand are the limited mobility and the space they take up on your desktop.
Next, we have some foam microphone pop filters. These work great for stopping plosives. They are usually sold for around a dollar a piece and come in a variety of colors.
b) For the Baller: Boom Arm with Shock Mount and Pop Filter or Wind Screen
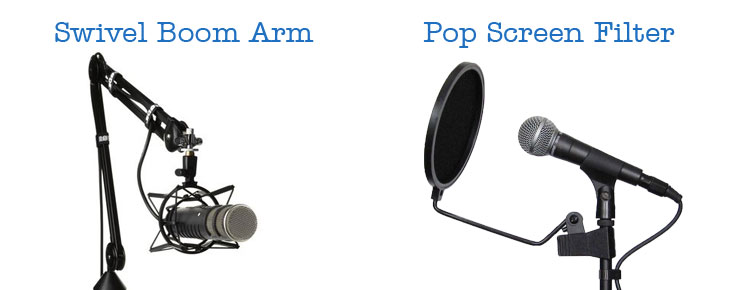
The most comfortable way to record is by using a swivel boom arm to hold your microphone. You can move around in your chair, and just pull the mic to where you want it. If you have your mic suspended in a shock mount, your audience will never know that you moved.
Boom arms can clip to your desktop, or they can be drill-mounted. There are a variety of swivel boom arms out there. When buying one, make sure it is compatible with the microphone you will be using.
Another nifty accessory for higher-end microphones is the windscreen. These come in a wide variety of styles, shapes, and sizes. Some can be affixed to the shock mount. Others, to the boom arm or mic stand.
I'm going to be honest; I find these windscreens to be a waste of money. They usually sell for around $20-$40, sometimes more. They're decent for recording vocals on a song, but unnecessary for a podcaster. If you go with the foam cover, you will get the same result, with a lot more money left in your pocket.
If you care more about looking pro, and less about sounding pro, go ahead and buy one of these screens. They do look good in pictures. But if quality audio is your goal, you will achieve it with a foam mic cover.
2. Preamp / Vocal Processor
A preamp or vocal processor is a unit that you run your vocals through. They are most often used for minor effects. Things like compression, gates, and limiters. The average listener would be hard-pressed to hear the difference. But, if you want your vocals to shine, you might consider buying one.
a) On a Budget: Not a Must Have
If you're just starting out, you could do without this piece of equipment. It is definitely not necessary for a solid sounding podcast. You can still produce a great sounding show, using just the microphones and mixers listed above.
b) For the Baller: The DBX 286s
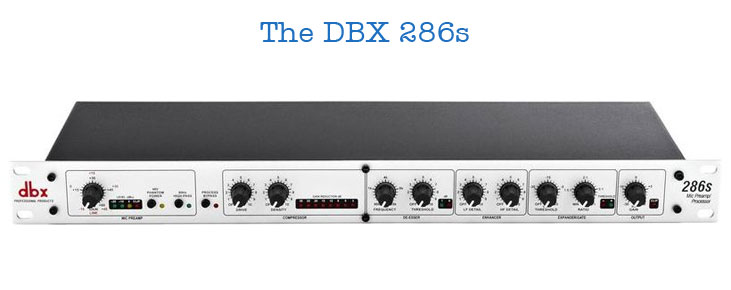
This is the unit that I run my vocals through when I record my podcast. It's a limiter/compressor that really tightens up your vocals. It does a great job of keeping your vocals at a consistent volume. This means that when you're whispering, you won't have to turn up the volume. And when you're yelling, you won't blow their eardrums out.
It has a "d-esser" to take some of the hiss out of your S's. You can use the gate feature to block out background noises. There are even input and output controls to juice up the power your vocals.
Like I said before, you could get away with not having a preamp/processor. But, if you're serious about getting the best sound quality possible, the DBX 286s is the way to go.
3. Headphone Splitter / Amplifier
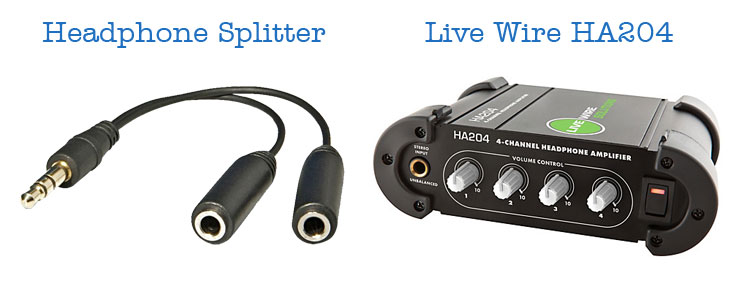
a) On a Budget: Ghetto Splitter
There's probably a technical name for this kind of splitter, but I don't know what it is. So, I'm just going to call them ghetto splitters. This is the way my brother and I would record our music back when we had our ghetto recording studio. They make it possible for two people to hear what's being recorded, even if you only have one headphone jack.
They have a quarter inch male stereo jack on one end that splits into two female jacks on the other end. This way, you can plug two sets of headphones into one headphone jack. This is a great solution if your podcast has to hosts. But, keep in mind, each split decreases the volume. This solution is not ideal for more than two sets of headphones.
b) For the Baller: Live Wire Solutions ha204
I've tried a few of the more costly headphone amplifier units, and this one is my favorite. It has a 1/4th-inch stereo input in the front, and two mono inputs in the back. It also features four headphone outputs, each with their own volume control.
Unlike the earlier solution, this splitter requires its own power source. This means you can plug in multiple sets of headphones without losing any volume.
In my studio, I can be recording two podcasters at the same time. They can both hear what's being recorded, as can I. There are other options out there that feature even more outputs. But for the average podcaster, this will more than suffice.
4. Portable Recorder
Not all podcasters like to record onto their computers. Sometimes, it’s not even an option. And for the cautious podcaster, it never hurts to have a back-up. That's where a portable recorder can come in handy.
You can use a portable recorder by itself. They usually have built-in microphones and some sort of memory device. They can also be hooked up to your mixer and record from there. This is always a good idea, as your DAW might occasionally fail you.
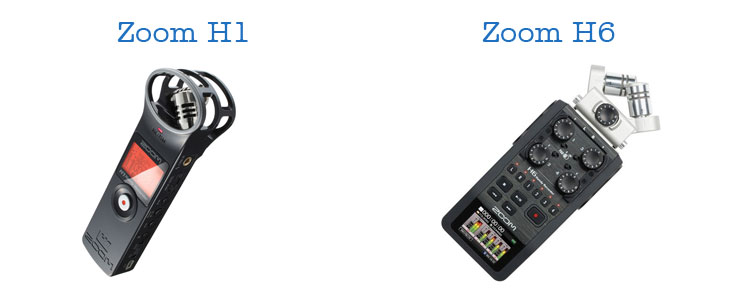
a) On a Budget: Zoom h2
This is an older model, but still worth the money. In fact, because it's a little older, it's underpriced for how well it works. I still use this model, and don't see myself upgrading, anytime soon.
It has two multi-directional microphones, which work great for field interviews. But I rarely use it for that purpose. Mainly, I use mine for backup recordings of my interviews.
This unit is great. It has a stereo input jack that I feed my mixer into. It records in stereo. This means I can split tracks for better editing. I do this with a process called mix-minus. More on that in another blog post.
It also has visual volume input control and peak indicator. These features help you avoid audio clipping. Watch your levels, avoid excessive peaks, and get a great recording, every time.
Lastly, it has microSD memory slot and a USB 2.0 for easy file storage and transfer. You can record in a variety of audio formats, including WAV files and mp3. While this is not an absolute "must have", it's still a useful piece of podcasting gear.
b) For the Baller: Zoom H6
This is the Cadillac of portable recording. I would only recommend this for serious podcasters, but if you really want to level up your game, this will do it. Let's take a closer look at some of this bad boy's features, and what they might mean for you.
First of all, it boasts four XLR microphone inputs. There are two more inputs available, with an upgrade. This means you can record up to six inputs at once, each on their own track. Each input has its own gain control, and even Phantom Power, if needed. On top of all that, it also has a built-in pre-amp, with a compressor and limiter.
This little unit could double as a full-on portable recording studio. And it fits in your pocket. It can record for up to 20 hours, on four AA batteries. You can also use it as a replacement for your audio interface, via its USB 2.0 adapter.
All in all, this thing is a beast. I love it.
5. Audio Clip Player
Let's face it, sound effects are fun. Laugh rolls, rim shots, celebrity quotes taken out of context, they're just fun. And it's great to have them on call, while you're recording.
That's not all. Some podcasters use intro and outro clips, and bumper music for commercial breaks. Not to mention, the commercials, themselves. Any serious podcaster is going to need a good amount of sample audio clips.
You can always go in and add all this in post-production. A lot of people do it that way, and there's nothing wrong with that. But a good soundboard can make all the difference for the podcaster who knows how to use it.
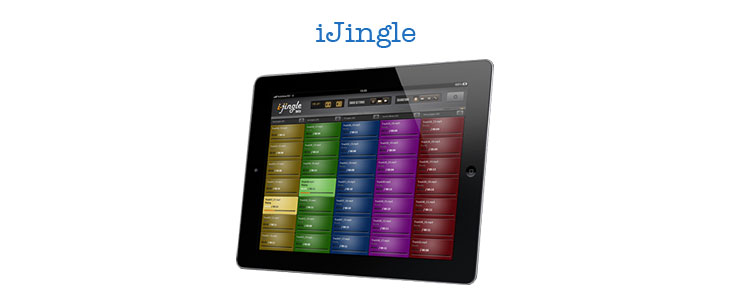
a) On a Budget: iJingle
I use a free tool, called iJingle. It's available on iPhone and Android. You can use it on your tablet or your phone, and it plays audio files that are already stored on your device.
Assign any sound file on your device to a button in the app, and push the button when you want the sound to play. You can even trim and edit sound files from within the app. This gives you complete control over your sound files.
It also works great if you have pre-recorded interviews to play on a live broadcast. iJingle will play an audio of any length. Load the interview on your device, assign it to a button, and push to play the interview.
The app allows for simultaneous playback of up to eight sounds at once. Meaning you can be playing some bumper music, and lay on some sound effects or audio clips at the same time.
This app is a lifesaver. And, best of all, you can get the slimmed down version for free.
b) For the Baller: iJingle Pro
There's also a paid version of iJingle, but you don't have to be a baller to get your hands on it. For around $10, you can get the pro version of iJingle, and access all its amazing features.
There are too many paid features to list in this post, so I will just cover a few of my favorites.
First, there's the mixer. This feature allows you to control the volume of your samples, on the fly. Fade in and fade out, set moods with audio undertones, and a whole lot more. This feature alone makes it worth paying the $10 dollars.
Next, there's what they call "auto-ducking". This is a form of side-chaining. It automatically adjusts the volume levels of one track, when another track is activated. If you have some music playing at full volume, you can still hit a sound effect that also happens to be set at full volume. The background music will "duck" to a lower level, then boost back to normal volume when the effect is done playing. This is useful, and worth the money of the paid version.
Lastly, the paid version includes voice recording, editing, and a live podcasting feature. Making it like an entire podcasting studio, in an app. You'll want to look into iJingle. Paid or free, it's a great tool to have at your disposal.
6. Sound Conditioning
We're almost at the end of this crazy long blog post. Let's end it with a final touch that can make a huge difference. Something we call "sound conditioning". Not to be confused with soundproofing. Sound conditioning is a different process, all together.
You don't want your podcast to sound like it was recorded in a bathroom. That kind of reverb sounds great on the main vocal track for a pop song. But, not so much on a professional broadcast.
You want the mic to pick up your voice once. But not next five times your voice bounces off your walls. Most mics will pick up at least a little bit of reverb from the room you're recording in. So we need to do some conditioning.
a) On a Budget: Blankets and Pillows
If you have some old blankets or pillows, these will work great for dampening the sound. Attach one or two on the wall directly behind your microphone. This will stop any vocal waves from bouncing back off of the wall and into your microphone.
Throw some blankets on the walls beside you and behind you. It is not necessary to cover every inch of your walls, but at least one blanket on each wall will do wonders.
Affix some pillows in two corners of the room, where the walls meet the ceiling. Bass and low-end sound waves like to get caught in these corners and can alter your acoustics.
If you have some extra blankets and pillows, this can drastically improve the sound of your podcast. Even though this was in the bonus section, I would encourage you not to skimp out on this one. Just do it. You can thank me, later.
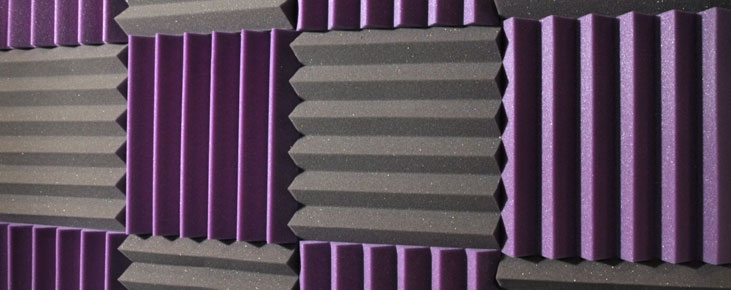
b) For the Baller: Acoustic Foam and Corner Bass Absorbers

You've probably seen professional recording studios on TV. They often have what looks like foam egg shells lining the walls. That's actually something called Acoustic Foam. It also comes in a variety of different patterns. You can get it in eggshells, pyramids, and wedges, just to name a few.
You'll want to have some acoustic foam on any walls that might be directly behind your microphone. A little bit on every wall in a room is a good idea. If you can afford it, acoustic foam is way better than the blanket solution, mentioned above.
To finish it off, you can apply some Corner Bass Absorbers to a couple of the room’s corners. This can have you sounding like you’re in a professional broadcasting studio. Nothing but your crystal clear vocals will be picked up by the mic.
There you have it.
Now you know exactly what you’ll need to in order put together your own podcasting studio. Whether you’re looking to spend a few hundred, or a few thousand, you can make every penny count. No matter what your budget is, you’ll have a great sounding podcast.
Here’s a little secret. Some of the best sounding podcasts out there use much of the more affordable gear featured in this post. The real trick is in good recording and mix-down techniques.
You could buy all the best gear listed here and still have a podcast that sounds like garbage. So don’t let a tight wallet stop you. Start with the affordable gear, and upgrade as you go. The most important part is to just get started.
Before you go, make sure you download the Podcast Quick Start Guide. It covers what gear you'll need to get started, where to host your podcast files, how to get listed on iTunes, and more. Plan on putting what you've learned here into action? Then you don't want to leave without it.